


Autumn entails a wide range of traditions from mushing apples into a cider press to driving up County Road 550 to take in all of nature’s true colors. It’s a tradition to go to the pumpkin patch and pick out the largest, or most charismatic, orange ball of joy there is to create something unique and festive. If you haven’t figured out what design you want to do or even mastered the skills of pumpkin carving, follow this step-by-step tutorial of making your doorstep standout from your neighbors’ throughout the Halloween season.
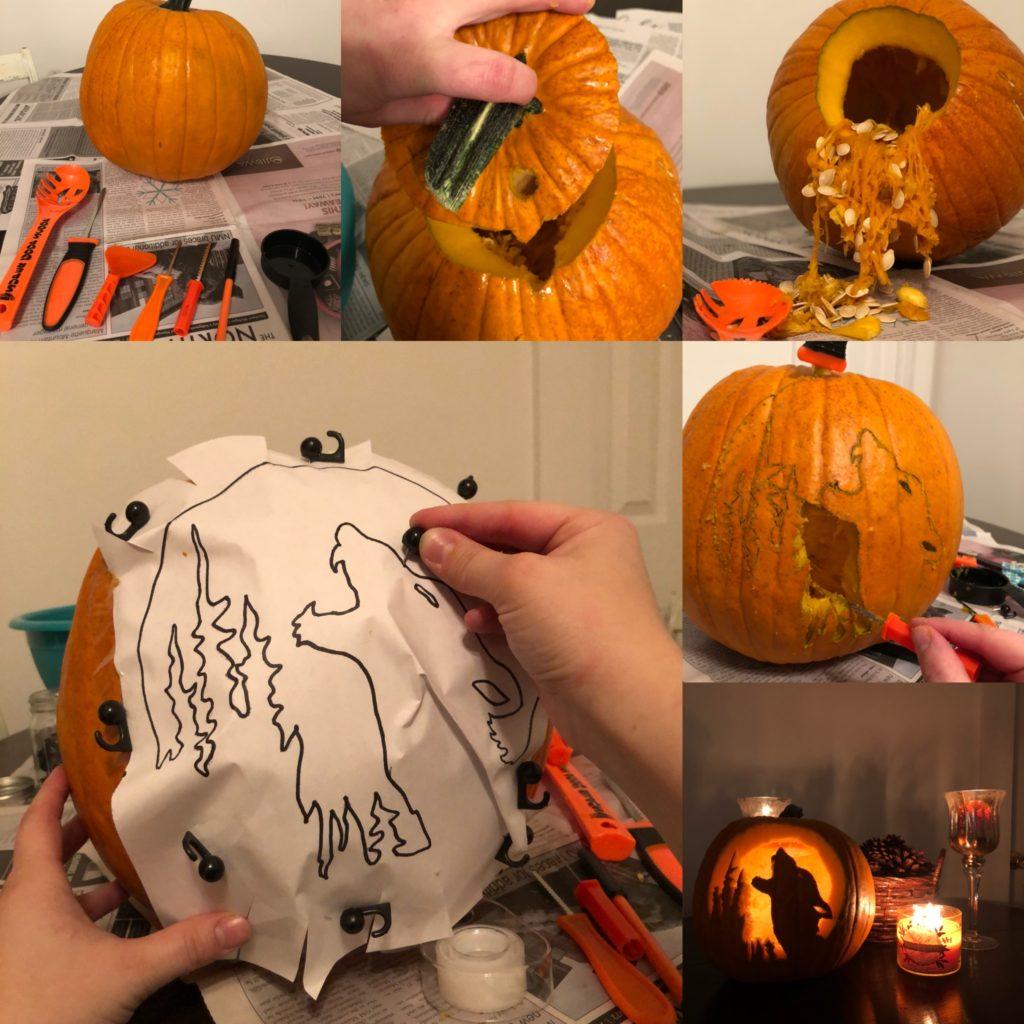
Step 1: Once you have selected your pumpkin of choice from a local farm stand or grocery store, it’s important to purchase the proper carving tools. For carving, you want to have at least three different blades. One for larger cuttings, and two for more intricate tracings. A large ladle or measuring cup will suffice for scooping out the pumpkin’s innards.
Step 2: Use a larger blade to cut a small triangle at the top of the base and then begin slicing in a circular rhythm around the step. Keep the blade at a 45-degree angle so that the top won’t directly fall into the pumpkin. After the top is off, create a small circle incision to act as a smoke hole for a candle.
Step 3: Here is where things get a little slimy so don’t be afraid to roll up your sleeves as you dig out the juiciest guts a fruit can produce. (Set aside those seeds, you might want to bake those up at a later date for a scary-movie snack.) Thoroughly clean out the pumpkin using a scraper.
Step 4: Pick out your pattern from either a pumpkin carving book or looking up free patterns on Pinterest. Then push-pin or tape the pattern to the pumpkin. If using tape, make sure the pumpkin is at room temperature or else the tape won’t stick. Mark the pattern with a push-pin, the closer the dots are to one another, the easier it will be for carving.
Step 5: Begin carving from the inside and work your way out to avoid concaving. Use a smaller blade for more intricate details of your design and a larger blade for more basic cutting. After you’ve carved out the pattern, remove any excess flesh sticking out.
Step 6: Now as Ryan Seacrest would say on American Idol, “It’s time to dim the lights.” Insert a tealight candle, and enjoy a week-long spooktacular glow. Note that a pumpkin is a fruit and once you burn a candle inside of it, it begins to cook and decay faster. Using a flameless LED tealight will prolong its decay, or sticking it outside will also help preserve its quality.